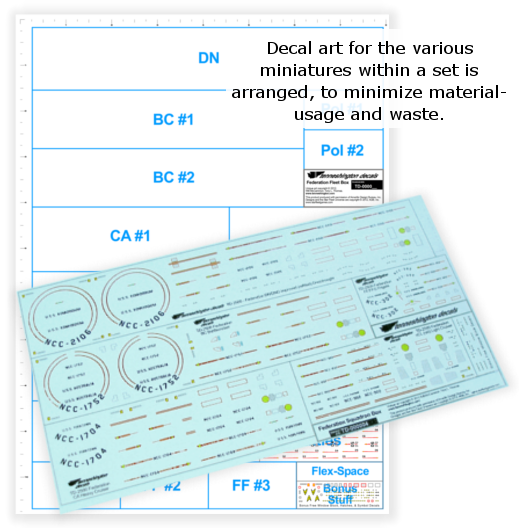
LAYOUT FOR OUR DECALS LAYOUT FOR OUR DECALS
The final step for preparing our products is creating an arrangement that fits the most usable decal art on a printable sheet.
We try to strike a balance between leaving lots of space between individual decal markings (to allow easy cutting and separation) and fitting the most sets on a printable sheet (to avoid wasting materials.
It's inevitable that there will be some small portions of the sheets that end up unused. We use those open areas for bonus windows, hatches, etc. We consider this much better than just wasted blank space.
PRINTING OUR DECALS
Our decals are printed using a high-end color laser printer, using the best quality decal paper. We then seal them using an acrylic clear coat to protect the printed artwork.
We use clear decal film paper, so there are no white outlines to worry about. However, please be aware that since we use clear film and our printing technology is laser-printer based, we cannot print white.
Also please note that our decals are intended to work only on a light color background (white or light gray). They will not look their best on a dark background (dark gray, red, etc.). Again, this is because they are laser-printed on clear film, so there is no layer of white pigment underlying the graphics to provide a reflective surface (the way white paper or decals from factory-made plastic model kits would).
SHIPPING OUR DECALS
We protect the printed decal sheets with zip-type plastic bags to prevent moisture intrusion and with a cardboard stiffener to avoid creasing.
INCLUDED WITH OUR DECALS
Any set of our decals includes fully-illustrated placement guides and detailed instructions to help walk you through the process of using our product. |